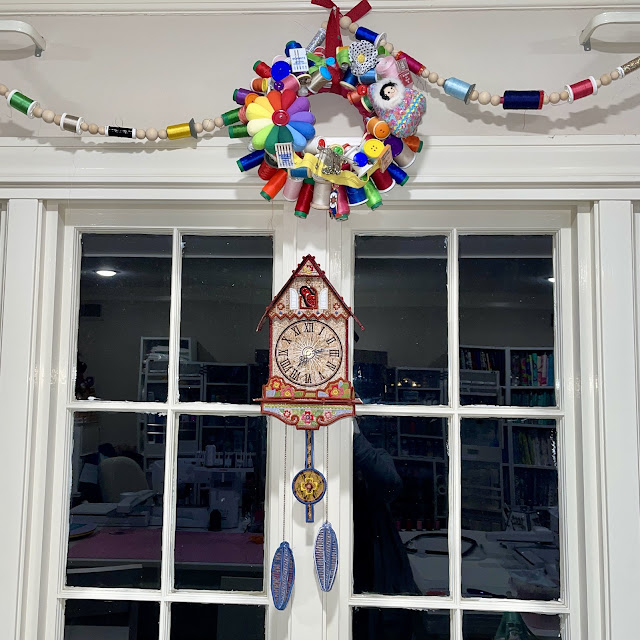
Freestanding Cuckoo Clock
I created a cuckoo clock this week
using OESD’s Freestanding Clock Pattern
and working clock kit.
This intricately machine embroidered
3D clock required 26 machine embroidered
cork pieces and definitely
tested my determination…
but will bring me joy in the studio
and perhaps even remind me
to check the time. (Probably not) #oesdfreestandingcuckooclock #oesdembroidery #bernina990 #bernina700

Beginning to stitch things...
first piece of 24 needed to create
the cuckoo clock on both my
Bernina 990 & 700 working hard in unison!


Once I finished stitching out all my EXP files...
It was time to soak off the stabilizer layers...
and then a few days would pass whilst they dried

Finally, I could return to OESD instructions
and slowly begin to stitch certain pieces
together as directed...

Then it was time to deal with my least favorite part... Pulling those nubs through the loops
and lobser clipping in place.
Thankfully, the designer on this project maintained much more consistent loop size creation them more recent designs I worked through...


The more layers... the denser,
the tricker it got to try to
pull those tabs through...
O.M.G.!!!

But eventually, I got there...

When I realized I only had clock pieces,
and pendulum remaining I was thrilled!

I did nearly all of it myself!
Awaiting on DH to put in clock unit...

My hubby made it home from
work and put my clock parts in!!!
I love it!!!

It even has a nice quiet seconds hand!

I added it to the wall of windows
in my sewing room...


No comments:
Post a Comment